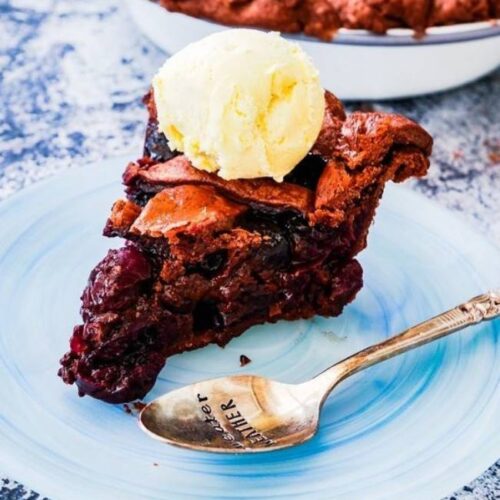
Dark Chocolate Cherry Pie Recipe
An easy homemade chocolate pastry crust, filled with a chocolate cherry filling. The best chocolate cherry pie you’ll ever taste!
Ingredients
For the chocolate pastry crust
- 310 g Plain or all-purpose flour
- 3 tbsp Cocoa powder
- 2 tbsp Caster sugar (US granulated sugar)
- 1 tbsp Salt
- 115 g Cold unsalted butter
- 95 g Cold vegetable shortening, I used Trex
- 120 ml Cold water
For the chocolate cherry filling
- 700 g Fresh or frozen sweet dark cherries Thaw out frozen cherries before using
- 135 g Caster sugar (US granulated sugar)
- 25 g Cornflour or cornstarch
- 1 tbsp Cocoa powder
- 1 tbsp Lemon juice
- 1 tbsp Vanilla extract
- ⅛ tbsp Almond extract
- 50 g Dark or semi-sweet chocolate chips
- 1 unit Beaten egg
Instructions
For the chocolate pastry
- In a large bowl, mix together the flour, cocoa powder, sugar, and salt until well combined. Cut the cold butter and cold vegetable shortening into cubes and add to the bowl. Using a pastry blender, a food mixer, or just two forks, cut the butter and shortening into the mixture. You want there to be little pea-sized lumps of butter visible – you definitely don’t want the butter to be completely incorporated into the flour.
- Gradually add the cold water to the bowl, ensuring to mix well after each addition. You might not need to use all the water, so don’t pour it all in at once!
- Once a dough starts to form, turn it out onto a lightly floured surface and knead slightly (don’t overwork the dough). Cut the dough into two evenly sized pieces and pat each piece down into a disc-shape. Wrap each disc with clingfilm or plastic wrap, and leave to chill in the fridge for at least an hour.
For the chocolate cherry filling
- If you are using frozen cherries, then ensure that you have defrosted them before using, as otherwise there will be too much liquid in the filling, and it won’t set properly. Pour away all the liquid from the defrosted cherries before beginning.
- If you are using fresh cherries, remove the stones from the middle of each cherry before beginning. I find a cherry pitter is the best way to do this!
- In a spacious mixing bowl, combine the cherries, sugar, cornflour, cocoa powder, lemon juice, vanilla extract, and almond extract.Mix together until completely combined, and then place in the fridge for at least half an hour, or whilst the dough is chilling.
To assemble the pie
- Preheat the oven to 200°C / 390°F (180°C fan). Remove one of the pastry discs from the fridge and roll out on a lightly floured surface (you can also use cocoa powder instead of flour if you like). You want the pastry to be big enough to fill a 9 inch pie dish (mine is about 2 inches deep).
- Carefully place the pastry into the pie dish, tucking it into all the edges with your fingers. Crimp the edges of the pastry with your fingers to help stop the pastry from shrinking in the oven. Don’t stretch the pastry, as otherwise it will un-stretch again in the oven!
- Spoon the chocolate cherry filling into the pastry case. Try to avoid adding in the extra juices at the bottom of the bowl – just pour these away. Sprinkle the top of the cherries with the chocolate chips, and then gently mix together (without damaging the pastry!)
- Take the second disc of pastry out of the fridge and roll out as before. Cut out shapes or strips of pastry to decorate the top of the pie. I went for a lattice effect. Once you have covered your pie, brush the pastry with beaten egg to help give it that nice sheen once baked.
- Bake the pie for 20 minutes at the current temperature, and then reduce to 190°C / 375°F (170°C fan) for a further 30 to 35 minutes. After the first 20 minutes, I also like to very gently cover the top of the pie with aluminium foil to stop the pastry browning too quickly. I also like to tear a little hole in the middle of the foil to let the steam out. Or you can use a pie shield if you have one.
- Once the pie has finished baking, leave to cool on a wire rack for at least an hour to let the filling set. Either serve warm immediately with ice cream, or leave to cool completely, cover with cling film or plastic wrap, and store in the fridge for a day or two. The pie can be reheated at 180°C / 350°F (160°C fan) for 20 minutes or so if wanted.